When we were looking for a microcontroller board that can run micropython, we came across pyboard, micro:bit and esp32 etc. Considering the factors like quick sourcing from India, different sensors and community support we bought BBC micro:bit.
The hardware specifications of micro:bit can be found at https://tech.microbit.org/hardware/ . This is small pocket sized board designed for education purpose to teach programming to kids. This board comes with many sensors like accelerometer and magnetometer to sense motion, temperature sensor, 5×5 LED matrix to display simple characters etc. This can be interfaced to computer using USB interface that provided mass storage interface to load program.
Microbit can be programmed using Microsoft makecode at https://makecode.microbit.org/. This a visual programming interface like scratch to program for micro:bit.
Powering micro:bit board:
Microbit can be powered by two AAA batteries connecting battey holder supplied with it. This can be powered using microusb connector. Once micro:bit is connected to Windows PC, it show new drive in my computer. This driver consists of two files one text file DETAILS.txt and html file MICROBIT.HTM, when you click html file you will be redirected to https://microbit.org/get-started/user-guide/overview/ where you get complete details of microbit.

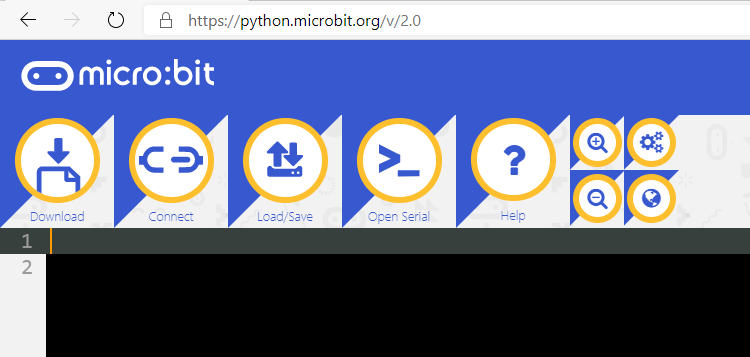
To start coding in python for microbit, you can use online python editor at https://python.microbit.org/v/2.0. This editor runs on browser and can interact with microbit using webUSB API. This editor allows you to use microbit python library and flash into the device. When launch this editor in browser you can see option to connect to microbit connected via microusb connector as shown in Fig 2
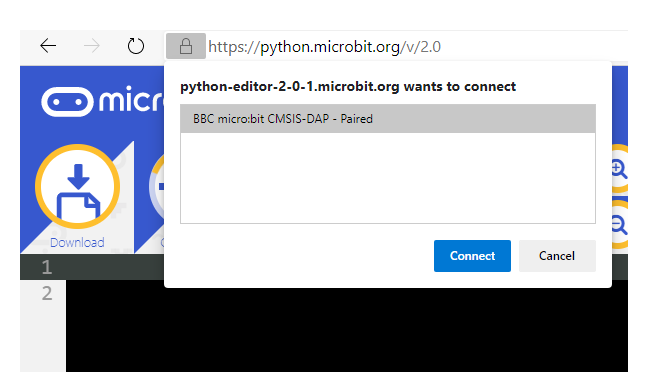
When Connect option in the python editor is selected it shows the details of microbit connected to PC. You have to select this and click connect as shown in below fig 3.
Once the device is connected to the editor, write a simple program which display some scrolling text on 5×5 LED matrix and you can flash the program developed by clicking Flash button in the python editor

Line 1 importing microbit python library. In line 4 using scroll method in display class to display “C2PLABS” scrolling text on 5×5 LED Matrix.