In this blog post we will discuss about writing simple led blink program for raspberry pi pico (rp2040) board using micropython. This article give details about raspberry pi pico board, its pinout and how to use micropython for this board.
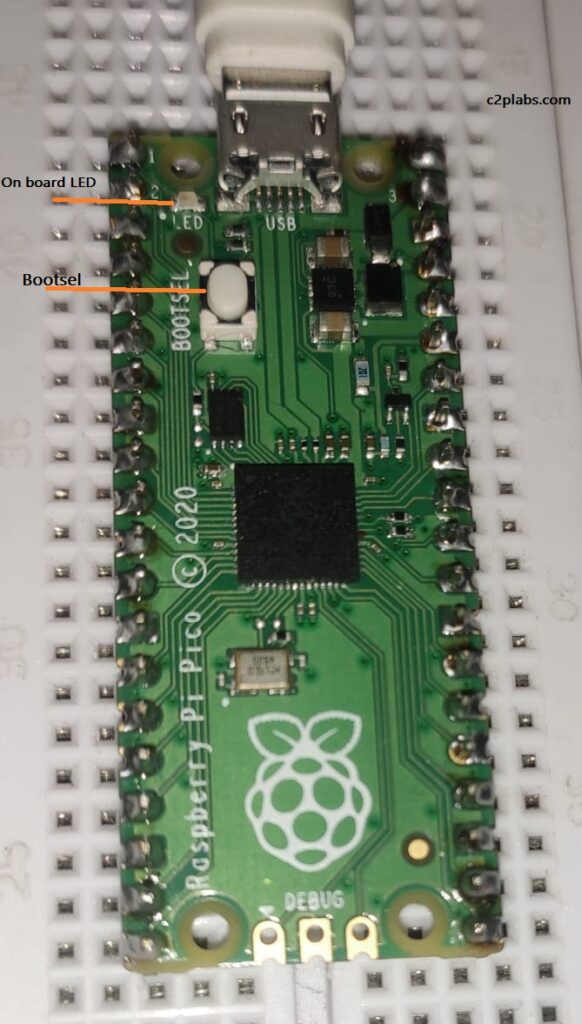
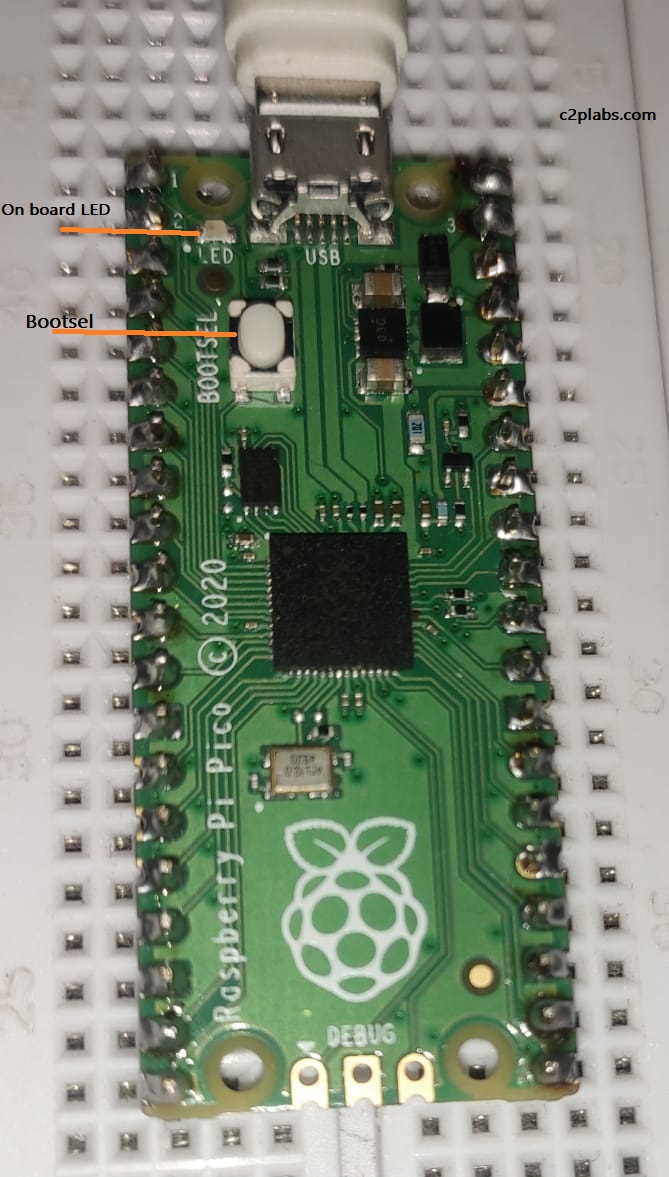
Raspberry pi pico is low cost microcontroller board based on RP2040 microcontroller. This microcontroller is based on ARM cortex M0+ cpu core. This board comes with multipurpose I/O pins, on board LED and BOOTSEL button. This BOOTSEL button is used to select USB booting while connecting to host computer for downloading the firmware.
Pinout details of this board and complete documentation can be found at https://www.raspberrypi.org/documentation/microcontrollers/raspberry-pi-pico.html. This board supports programming with micropython in addition to C/C++ sdk. This article explains how to use micropython to develop simple LED blink program using on board LED which is connected to GPIO 25.
We are using Thonny python IDE for this purpose. This IDE support different micropython boards. This IDE can be downloaded at https://thonny.org/.
To configure Thonny IDE for raspberry pi pico board, connect the board to windows computer on which Thonny is running, When you are connecting the board first time make sure that BOOTSEL pin is pressed. This will allow USB booting of the raspberry pi pico and pico board is represented as mass storage device (disk drive) to the host computer. We can copy UF2 firmware files developed using C/C++ sdk to this drive. once the UF2 file is copied to this driver, RP2040 starts executing this program from flash memory. To work with micropython we have to download micropython firmware on to pico disk drive. Micropython firmware for raspberry pi pico can be downloaded from
https://micropython.org/download/rp2-pico/
We are using current latest stable release rp2-pico-20210902-v1.17.uf2 and copy into RPI-PICO disk drive. Once this firmware copy is completed the pico board starts executing this code, this will make pico usb port as CDC device( COM port). COM port number can be seen from windows device manager, this COM port is used while configuring Thonny python IDE.
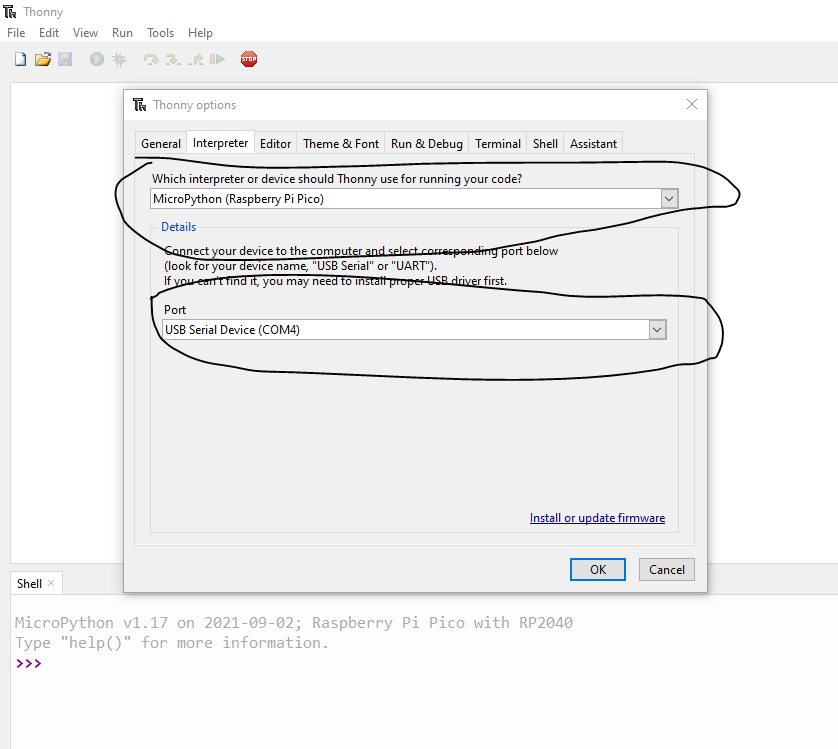
Start the Thonny IDE and click on Tools menu and select Options, then a tabbed dialog will open, go to interpreter tab and select the device to Raspberry pi pico and Port (USB to Serial COM port seen in device Manager) as shown below. This establishes connection to pi pico board.
In Thonny editor click File->New to open new python file and start writing the code in the editor
from machine import Pin
import utime

led_pin = Pin(25,Pin.OUT)

led_pin.toggle()

while True:
    led_pin.toggle()
    utime.sleep(1)
We are importing Pin class from machine micropython framework, machine micropython library implements board specific implementation of various python classes for controlling I/O pins of the pi pico.
We are instantiating Pin class with GPIO 25 which connected to onboard LED. toggle() method change the logic state of gpio pin 25.
There is simple while loop which keeps toggling LED for every one second.